优美的动画效果能够很大程度上提高 App 的用户体验。这两天玩了不少 App,基本上都是 AppStore 排名 top200 的(免费榜),发现这些 App 的体验都相当好……每一款优秀 App 的背后,都有一个优秀的团队。
这篇博客主要练习的是基础动画,接下来时间如果充足的话,会依次总结一下核心动画,帧动画,自定义转场动画。
废话不多说,直接看效果图和 demo 吧!
1. Frame Bounds Center
- 以下是改变 Frame Bounds Center 的效果图,只用了一个方法
+ (void)animateWithDuration:(NSTimeInterval)duration animations:(void (^)(void))animations completion:(void (^ __nullable)(BOOL finished))completion, 在 animations 及 completion 的回调里,改变相关属性即可。
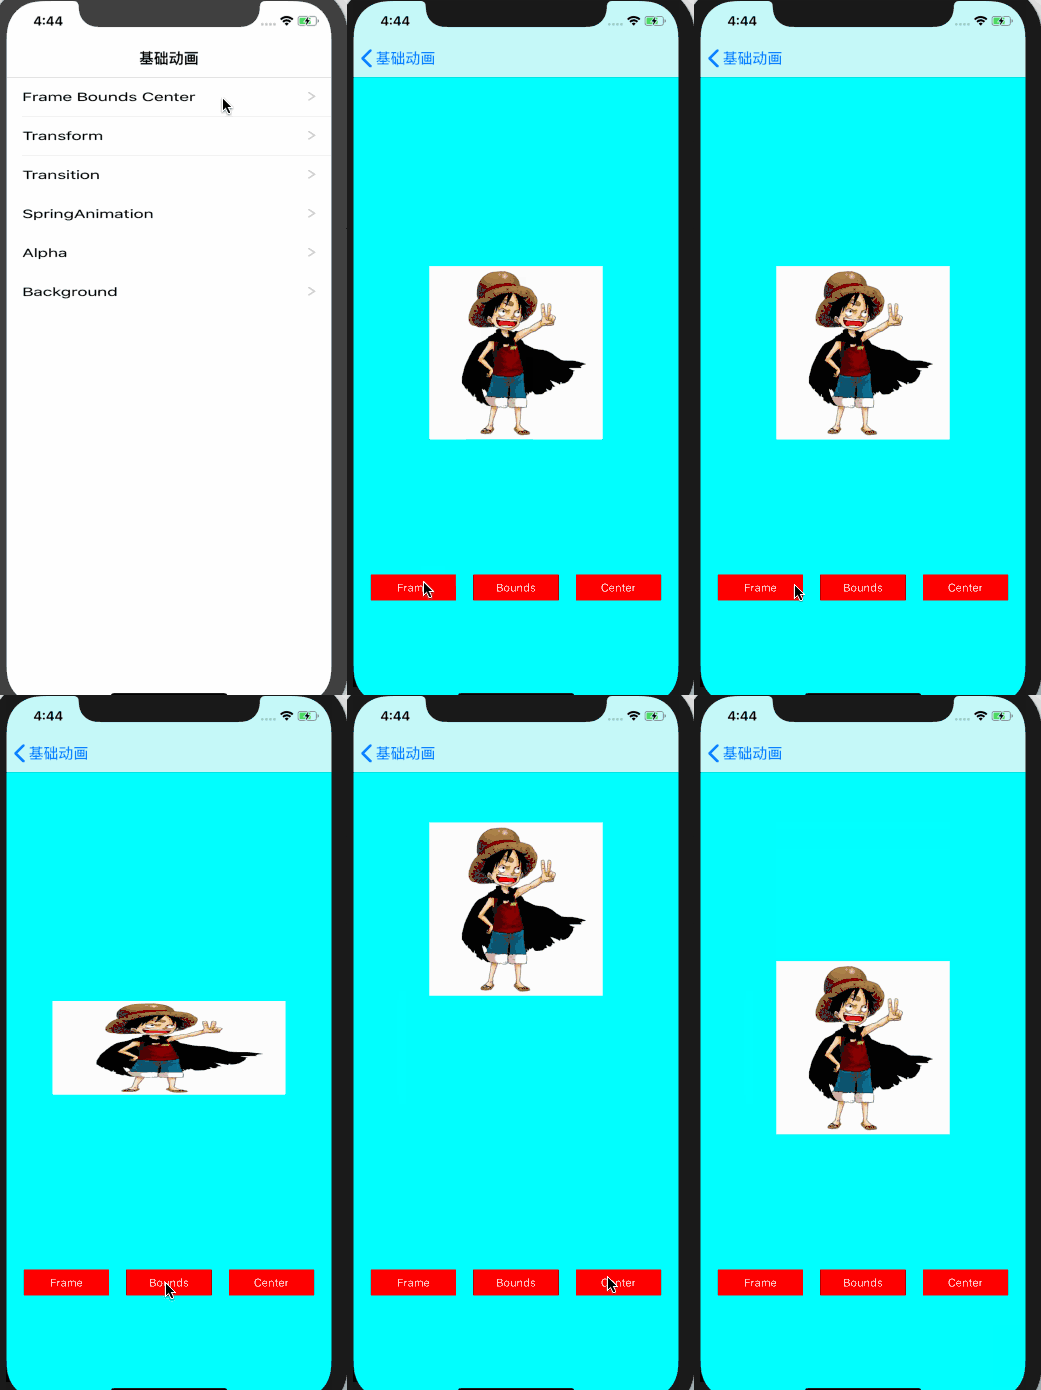
1.1 改变 frame 属性 demo
 1
 2
 3
 4
 5
 6
 7
 8
 9
10
11
12
13
14
15
|
- (void)changeFrame {
    CGRect originalFrame = self.nnView.headerImage.frame;
    CGRect changeFrame = CGRectMake(self.nnView.headerImage.frame.origin.x, self.nnView.headerImage.frame.origin.y - 120, 200, 80);
    [self changeOriginalRect:originalFrame changeRect:changeFrame];
}

- (void)changeOriginalRect:(CGRect)originalRect changeRect:(CGRect)changeRect {
    [UIView animateWithDuration:0.5 animations:^{
        self.nnView.headerImage.bounds =  changeRect;
    } completion:^(BOOL finished) {
        [UIView animateWithDuration:1 animations:^{
            self.nnView.headerImage.bounds = originalRect;
        }];
    }];
}
|
1.2 改变 bounds 属性 demo
1
2
3
4
5
|
- (void)changeBounds {
    CGRect originalBounds = self.nnView.headerImage.bounds;
    CGRect changeBounds = CGRectMake(0, 0, self.view.frame.size.width - 100, 100);
    [self changeOriginalRect:originalBounds changeRect:changeBounds];
}
|
1.3 改变 center 属性 demo
 1
 2
 3
 4
 5
 6
 7
 8
 9
10
11
|
- (void)changeCenter {
    CGPoint originalPoint = self.nnView.headerImage.center;
    CGPoint changePoint = CGPointMake(self.nnView.headerImage.center.x, self.nnView.headerImage.center.y - 160);
    [UIView animateWithDuration:0.5 animations:^{
        self.nnView.headerImage.center = changePoint;
    } completion:^(BOOL finished) {
        [UIView animateWithDuration:1 animations:^{
            self.nnView.headerImage.center = originalPoint;
        }];
    }];
}
|
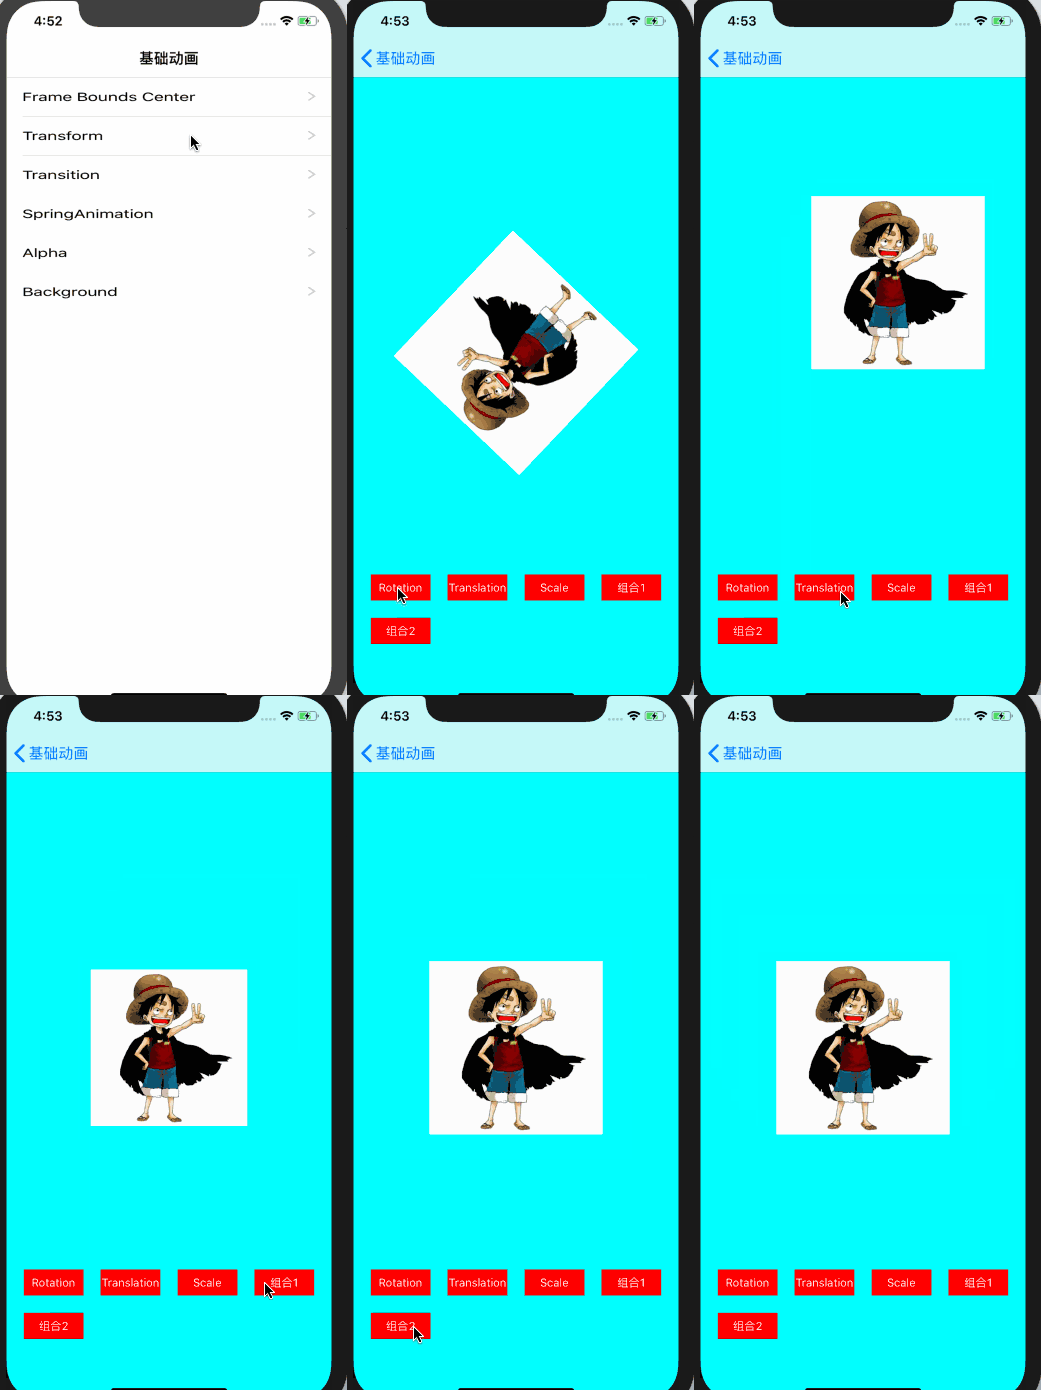
Transform 用的也是这个方法 + (void)animateWithDuration:(NSTimeInterval)duration animations:(void (^)(void))animations completion:(void (^ __nullable)(BOOL finished))completion, 不同的是在 animations 及 completion 的回调里,更改了控件的 transform 属性,demo 如下:
 1
 2
 3
 4
 5
 6
 7
 8
 9
10
11
12
13
14
15
16
17
18
19
20
21
22
23
24
25
26
27
28
29
|
- (void)changeTransform:(NSInteger)integer {
    [UIView animateWithDuration:1 animations:^{
        switch (integer) {
            case 0:
                self.nnView.headerImage.transform = CGAffineTransformMakeRotation(M_PI*1.2);
                break;
            case 1:
                self.nnView.headerImage.transform = CGAffineTransformMakeTranslation(50, -100);
                break;
            case 2:
                self.nnView.headerImage.transform = CGAffineTransformMakeScale(0.3, 0.3);
                break;
            case 3: {
                CGAffineTransform transform = CGAffineTransformMakeRotation(M_PI*1.2);
                self.nnView.headerImage.transform = CGAffineTransformScale(transform, 1.8, 1);
            }
                break;
            case 4: {
                CGAffineTransform transform = CGAffineTransformMakeTranslation(0, -100);
                self.nnView.headerImage.transform = CGAffineTransformScale(transform, 1.8, 1);
            }
                break;
        }
    } completion:^(BOOL finished) {
        [UIView animateWithDuration:1 animations:^{
            self.nnView.headerImage.transform = CGAffineTransformIdentity;
        }];
    }];
}
|
3. Transition
转场动画用的是这个方法,+ (void)transitionWithView:(UIView *)view duration:(NSTimeInterval)duration options:(UIViewAnimationOptions)options animations:(void (^ __nullable)(void))animations completion:(void (^ __nullable)(BOOL finished))completion,效果图:
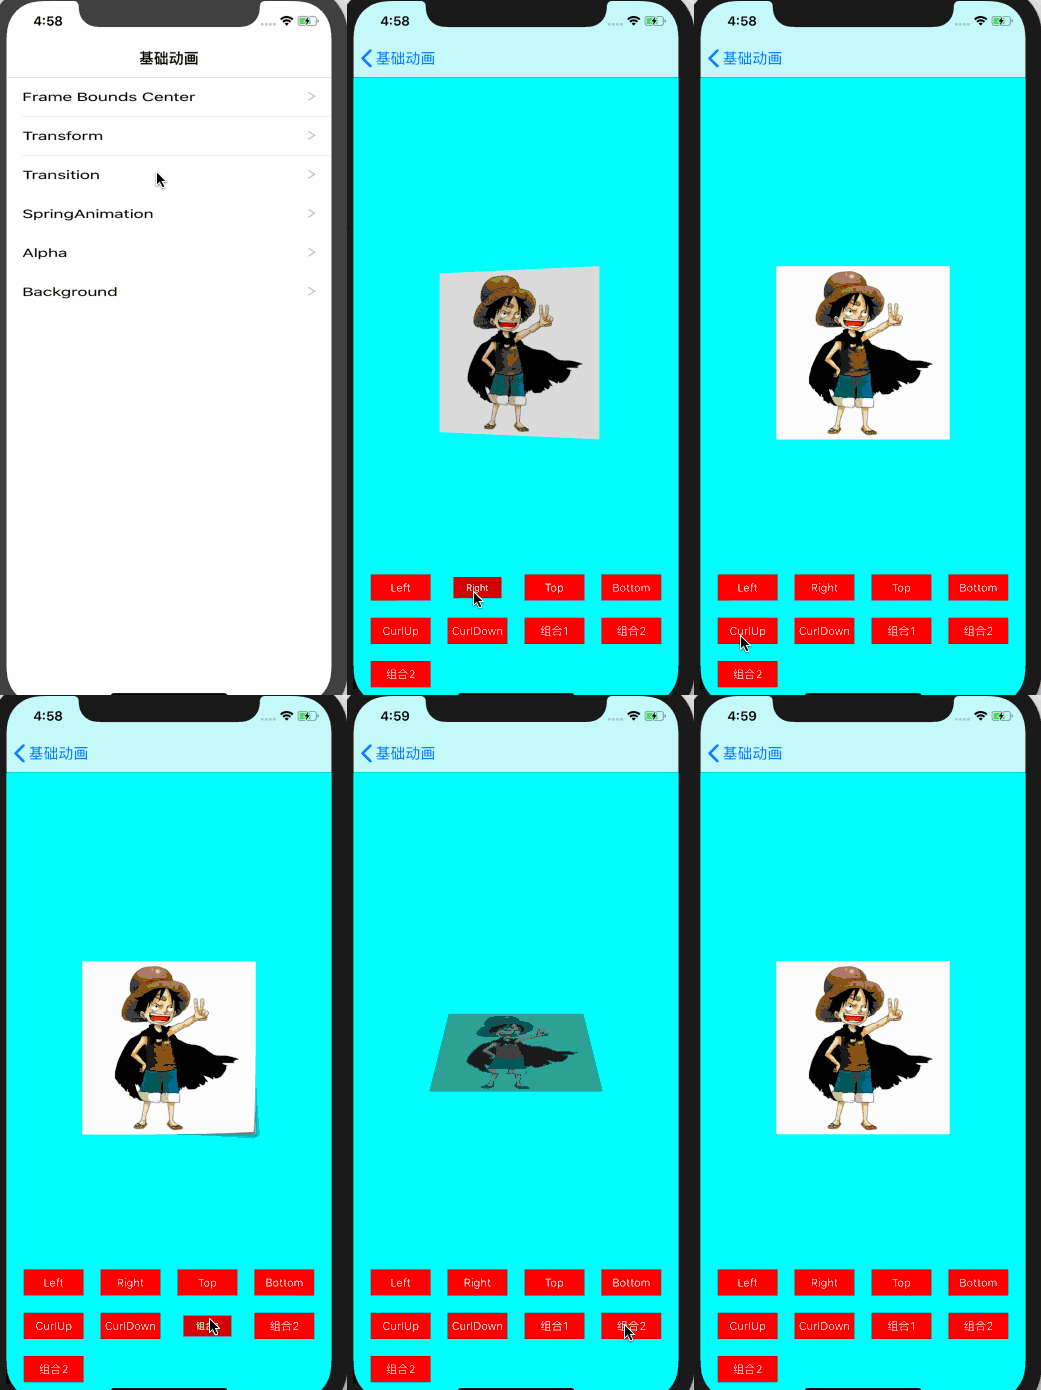
3.1 Left, Right, Top, Bottom, CurlUp, CurlDown 转场动画,只是 UIViewAnimationOptions这个枚举值不同,具体代码如下:
 1
 2
 3
 4
 5
 6
 7
 8
 9
10
11
12
13
14
15
16
17
18
19
20
21
22
23
24
25
26
27
28
29
30
31
32
33
34
35
36
37
38
39
|
- (void)buttonClick:(UIButton *)sender {
    switch (sender.tag) {
        case 0:
            [self transitionAnimation:UIViewAnimationOptionTransitionFlipFromLeft];
            break;
        case 1:
            [self transitionAnimation:UIViewAnimationOptionTransitionFlipFromRight];
            break;
        case 2:
            [self transitionAnimation:UIViewAnimationOptionTransitionFlipFromTop];
            break;
        case 3:
            [self transitionAnimation:UIViewAnimationOptionTransitionFlipFromBottom];
            break;
        case 4:
            [self transitionAnimation:UIViewAnimationOptionTransitionCurlUp];
            break;
        case 5:
            [self transitionAnimation:UIViewAnimationOptionTransitionCurlDown];
            break;
        case 6:
            [self transitionAnimationWithFrontOption:UIViewAnimationOptionTransitionCurlUp backOption:UIViewAnimationOptionTransitionCurlDown];
            break;
        case 7:
            [self transitionAnimationWithFrontOption:UIViewAnimationOptionTransitionFlipFromTop backOption:UIViewAnimationOptionTransitionFlipFromBottom];
            break;
        case 8:
            [self transitionAnimation];
            break;

        default:
            break;
    }
}

- (void)transitionAnimation:(UIViewAnimationOptions)option {
    [UIView transitionWithView:self.nnView.headerImage duration:0.8 options:option animations:^{
    } completion:nil];
}
|
3.2 组合1, 组合2 , 组合3 demo
- 组合1, 组合2 , 组合3 是在
+ (void)transitionWithView:(UIView *)view duration:(NSTimeInterval)duration options:(UIViewAnimationOptions)options animations:(void (^ __nullable)(void))animations completion:(void (^ __nullable)(BOOL finished))completion 的 completion 回调里,又嵌套了一下自身。
 1
 2
 3
 4
 5
 6
 7
 8
 9
10
11
12
13
14
15
16
17
18
19
20
21
|
/** 组合1 组合2 */
- (void)transitionAnimationWithFrontOption:(UIViewAnimationOptions)frontOption backOption:(UIViewAnimationOptions)backOption  {
    [UIView transitionWithView:self.nnView.headerImage duration:0.8 options:frontOption animations:^{
        self.nnView.headerImage.alpha = 0.3;
    } completion:^(BOOL finished) {
        [UIView transitionWithView:self.nnView.headerImage duration:0.8 options:backOption animations:^{
            self.nnView.headerImage.alpha = 1;
        } completion:nil];
    }];
}

/** 组合3 */
- (void)transitionAnimation {
    [UIView transitionWithView:self.nnView duration:1 options:UIViewAnimationOptionTransitionFlipFromLeft animations:^{
        self.nnView.backgroundColor = [UIColor blueColor];
    } completion:^(BOOL finished) {
        [UIView transitionWithView:self.nnView duration:1 options:UIViewAnimationOptionTransitionFlipFromRight animations:^{
            self.nnView.backgroundColor = [UIColor cyanColor];
        } completion:nil];
    }];
}
|
4. SpringAnimation
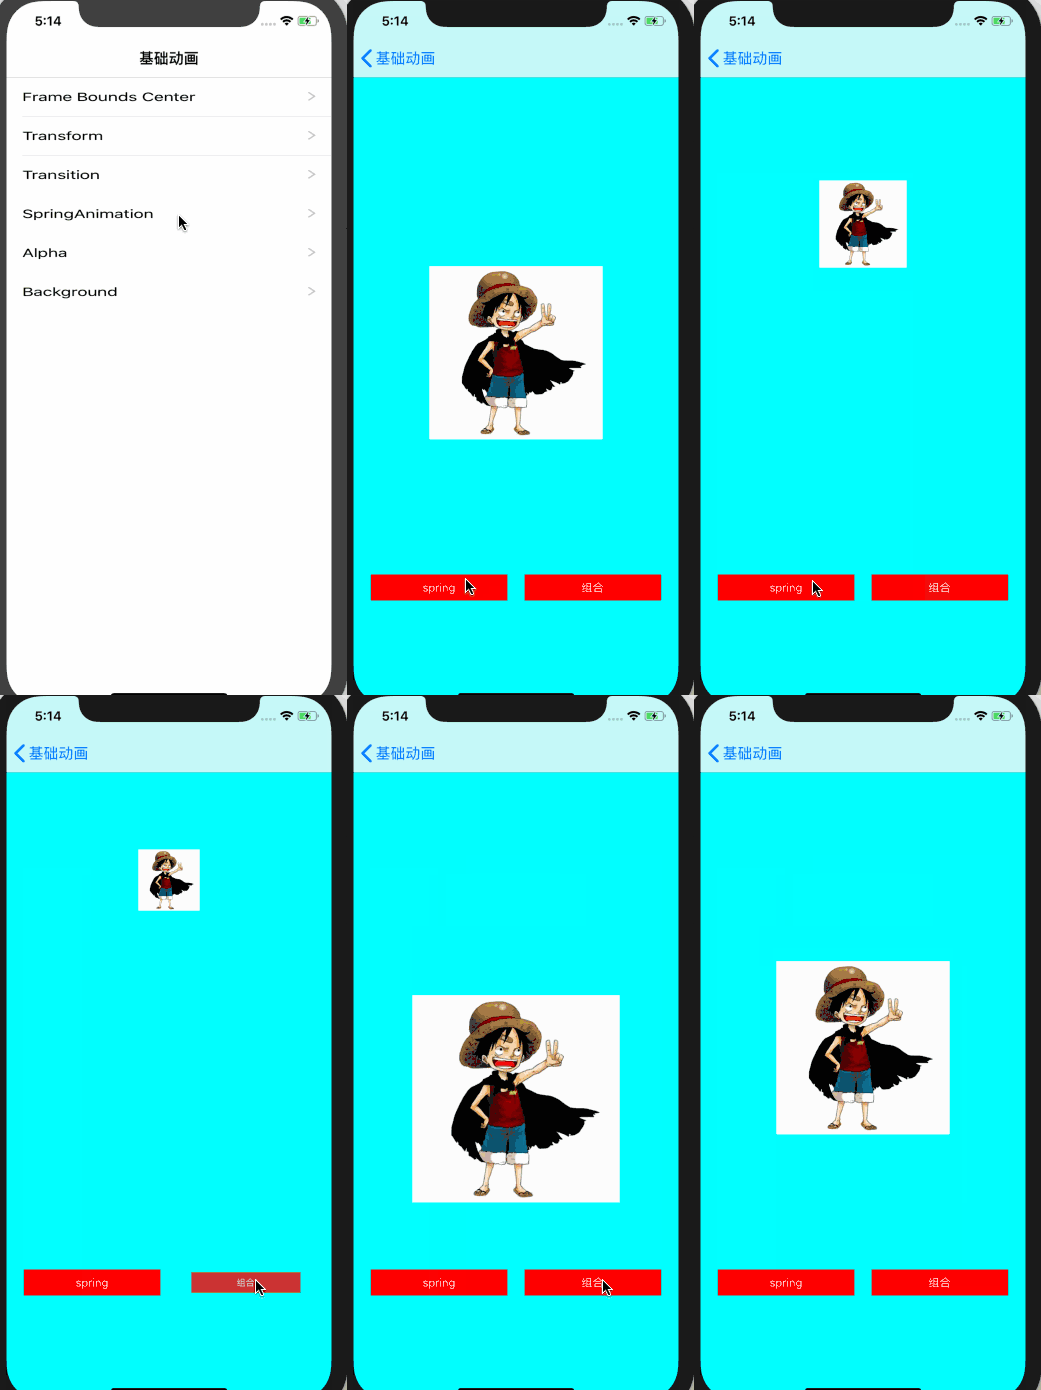
- 弹簧效果动画调用的是这个方法,
+ (void)animateWithDuration:(NSTimeInterval)duration delay:(NSTimeInterval)delay usingSpringWithDamping:(CGFloat)dampingRatio initialSpringVelocity:(CGFloat)velocity options:(UIViewAnimationOptions)options animations:(void (^)(void))animations completion:(void (^ __nullable)(BOOL finished))completion 其中 dampingRatio (阻尼系数)的范围为 0.0f 到 1.0f,数值越小弹簧的振动效果越明显; velocity (弹性速率) 是形变的速度,velocity 越大,形变越快。效果图:
 1
 2
 3
 4
 5
 6
 7
 8
 9
10
11
12
13
14
15
16
17
18
19
20
21
22
|
- (void)springAnimation1 {
    CGRect originalRect = self.nnView.headerImage.frame;
    CGRect changeRect = CGRectMake(self.nnView.headerImage.center.x-50, self.nnView.headerImage.center.y - 200, 100, 100);
    [UIView animateWithDuration:1 delay:0 usingSpringWithDamping:0.3 initialSpringVelocity:4 options:UIViewAnimationOptionCurveLinear animations:^{
        self.nnView.headerImage.frame = changeRect;
    } completion:^(BOOL finished) {
        self.nnView.headerImage.frame = originalRect;
    }];
}

- (void)springAnimation2 {
    CGRect originalRect = self.nnView.headerImage.frame;
    CGRect changeRect = CGRectMake(self.nnView.headerImage.center.x-50, self.nnView.headerImage.center.y - 200, 100, 100);
    [UIView animateWithDuration:1 delay:0 usingSpringWithDamping:0.3 initialSpringVelocity:4 options:UIViewAnimationOptionCurveLinear animations:^{
        self.nnView.headerImage.frame = changeRect;
    } completion:^(BOOL finished) {
        [UIView animateWithDuration:1 delay:0.3 usingSpringWithDamping:0.3 initialSpringVelocity:4 options:UIViewAnimationOptionCurveLinear animations:^{
            self.nnView.headerImage.frame = originalRect;
        } completion:nil];
    }];
}
|
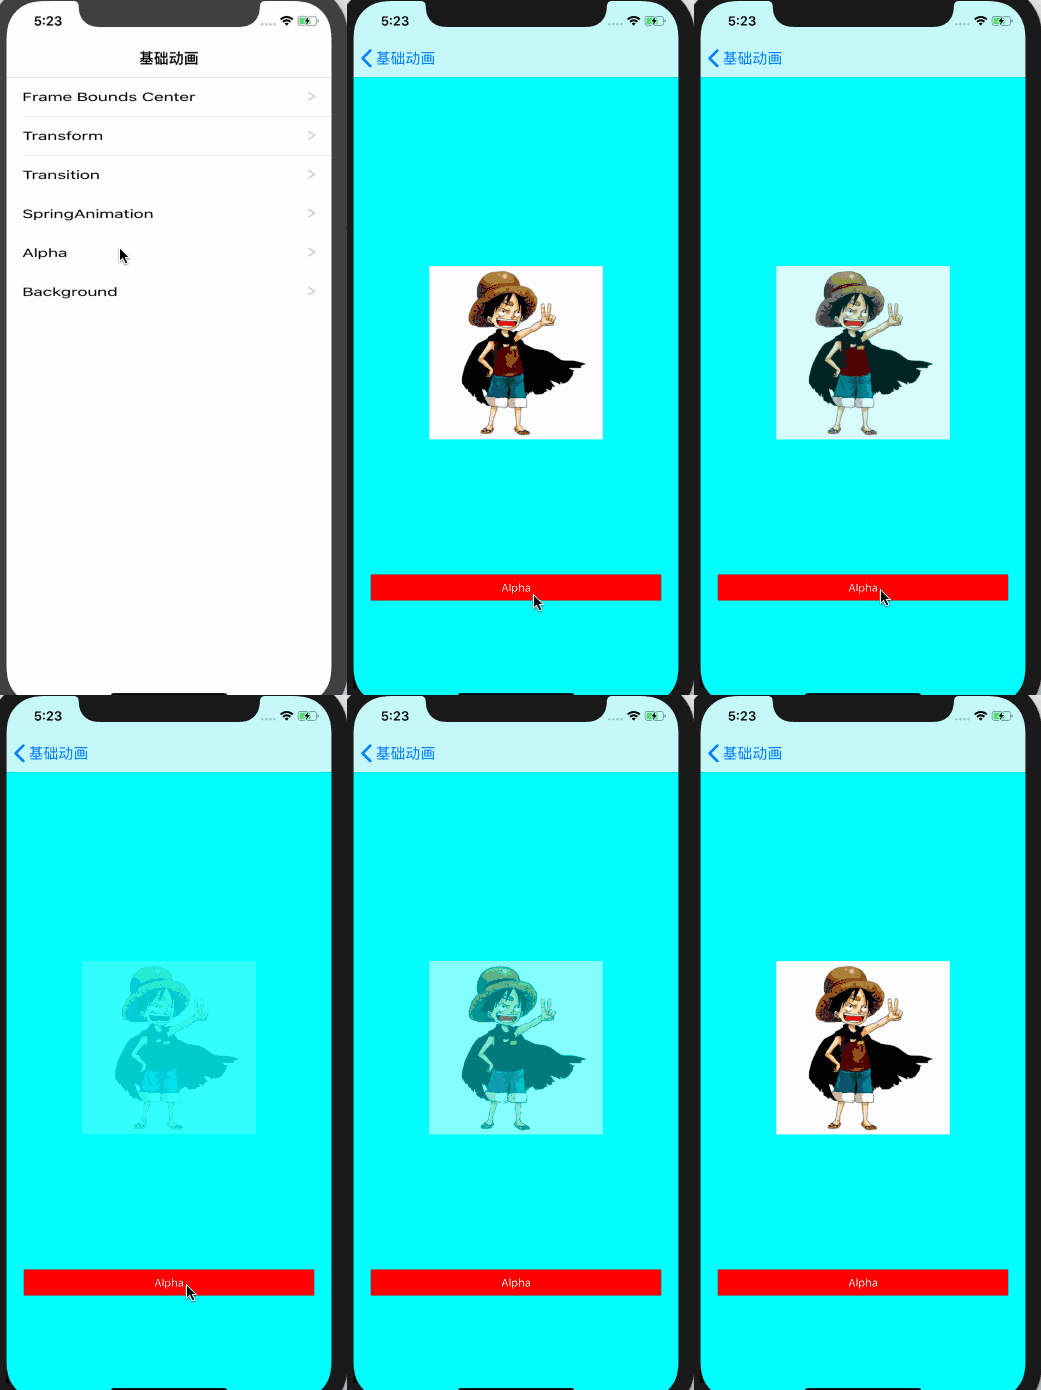
5. Alpha
- 和改变frame,bounds用的方法一样,在回调里改变
alpha 属性。
1
2
3
4
5
6
7
8
9
|
- (void)changeAlpha {
    [UIView animateWithDuration:1.5 animations:^{
        self.nnView.headerImage.alpha = 0.2;
    } completion:^(BOOL finished) {
        [UIView animateWithDuration:1.5 animations:^{
            self.nnView.headerImage.alpha = 1;
        }];
    }];
}
|
6. BackgroundColor
改变 backgroundColor 用的是下面这两个方法
1
2
|
+ (void)animateKeyframesWithDuration:(NSTimeInterval)duration delay:(NSTimeInterval)delay options:(UIViewKeyframeAnimationOptions)options animations:(void (^)(void))animations completion:(void (^ __nullable)(BOOL finished))completion NS_AVAILABLE_IOS(7_0);
+ (void)addKeyframeWithRelativeStartTime:(double)frameStartTime relativeDuration:(double)frameDuration animations:(void (^)(void))animations NS_AVAILABLE_IOS(7_0);
|
第二个方法有两个参数,frameStartTime 和 frameDuration ,分别代表 “动画在什么时候开始” 以及 “动画所持续的时间”。效果图:

 1
 2
 3
 4
 5
 6
 7
 8
 9
10
11
12
13
14
15
16
17
18
19
20
21
22
23
24
25
26
|
/**
 *  frameStartTime 动画在什么时候开始
 *  frameDuration 动画所持续的时间
 */
- (void)changeBackground {
    [UIView animateKeyframesWithDuration:10.0 delay:0.f options:UIViewKeyframeAnimationOptionCalculationModeLinear animations:^{
        [UIView addKeyframeWithRelativeStartTime:0.f relativeDuration:1 / 5.0 animations:^{
            self.nnView.backgroundColor = [UIColor blueColor];
        }];
        [UIView addKeyframeWithRelativeStartTime:1 / 5.0 relativeDuration:1 / 5.0 animations:^{
            self.nnView.backgroundColor = [UIColor yellowColor];
        }];
        [UIView addKeyframeWithRelativeStartTime:2 / 5.0 relativeDuration:1 / 5.0 animations:^{
            self.nnView.backgroundColor = [UIColor redColor];
        }];
        [UIView addKeyframeWithRelativeStartTime:3 / 5.0 relativeDuration:1 / 5.0 animations:^{
            self.nnView.backgroundColor = [UIColor orangeColor];
        }];
        [UIView addKeyframeWithRelativeStartTime:4 / 5.0 relativeDuration:1 / 5.0 animations:^{
            self.nnView.backgroundColor = [UIColor whiteColor];
        }];
    } completion:^(BOOL finished) {
        self.nnView.backgroundColor = [UIColor cyanColor];
        NSLog(@"动画结束");
    }];
}
|
demo 可以在这里下载,欢迎讨论。


